May 27, 2011

Quilt 'Til You Wilt

I just discovered a new Quilt Shop, an out of the way little place called Quilt 'Til You Wilt.  Wonderful place, if you're ever in the area you should certainly stop buy.  Not a plug just a true thrilled customer.

Today I only bought three little things, which all fit into one small bag, but good things come in small packages.  Like how about this panel by Elizabeth's Studios?  I'm going to start with a border of pink and then see how it grows and how well my stash can nurture it along.  Should be fun to watch it grow.  Yes, I said pink now no arguing you can help me decide the borders after I add the pink.

All around the store they have these little baskets.  Each basket has different goodies - all with amazing deals.  Would you believe I only paid $3.10 total for both of those spools of thread?  Figured this was a good a time as any to try out a couple of new threads.


Now I know, if I keep going you'll be aching to visit and most of you can't so I'll stop with "Do you know everything you ever wanted in a quilt store?  But have never found one that quite suits you?  This is that one".

 Sorry they are a brick and mortar store only.

May 26, 2011

No more bad Taste

The other day when I was squaring up the center of the Dresden Plate Quilt, I found myself with a bad taste in my mouth.  You know that semi distaste you get when you've been thinking about something to long?  Be it a remodel that isn't finished yet, a project you've been dreading, or in this case a quilt.

So I Hmmped and Errggged about it to myself for a while before coming to a simple and foregone conclusion.  You see I'd already made the borders for this quilt, so even though the bad taste was telling me all was lost I took the plunge and added the borders I'd made.  A funny thing happened while I was sewing on the borders.  First the folded border went on and even as it did I could see the blue in the Dresden Plates being pulled out and brought full circle (or square in this quilt's case).  That bad taste?  Well it started to fade.  The more I stitched the more I felt again in harmony with my Dresden Plate Quilt.

When both borders were on I started to iron down the border seams and that's when it hit me.  By adding the blue borders it forced the background fabrics back into the background where they belong and brought those blue plates forward.  As I took the pictures of the quilt, with Tiny's help of course, the quilt began to feel more and more a facet of myself.  No longer the bold background of "what was I thinking" but more the gentle hum that I knew I could do it.

Always my gentle quilt helper, Tiny was on the scene for pictures before I even had the quilt fully unfolded.  First she went under it, but not being in the mood to play hide and seek she slipped down one side while I straightened the other.  By the time I was refolding the quilt she was back.  After all these new things smell like time and love and really should have more cat smell to them.


Right now the without getting out the tape measure I can say the quilt is right about 87"x89", and I wonder...  Perhaps it's time to call the top finished?

By chance do you have a project like this?  The lack of an iron kept me from this one, how about you?  I say let's throw away the bad taste and go with our gut.  At the very least I can guarantee the cat will like  it.

May 22, 2011

Raising the Artistic Child

It's times like these I think my blog should say something like this post's title "Raising The Artistic Child".  Or how to go crazy in five easy steps.

On my good days this spring I've been going around the house and opening curtains and windows each morning.  For the most part this applies to DD's room, and let's just say sometimes it's better if I don't go in there...  So this morning, I make her bed and putter around a bit when I find this:
Each time I think maybe I'm done dealing with art everywhere all over my house.  Something else happens.  I recall being a youngster and I did some mild things like this, and then the day came, when I was five, that I took nail polish (the peal off kind" and painted it all over my room.  I thought it was beautiful, though I was disappointed that it didn't work like real paint to give me more than a touch of coverage.  When my mother saw she made me clean it all up all by my self.  There was one spot on my dresser that I was never able to fully get off and it stayed there all through my middle school and high school years until after I moved out and mother refinished the dresser.

Never again did I color on walls.  Never again did I put my art to anything other than paper.  Until I was older and added a touch to a mirror and then later glass...  That was the end of my "little kid" art.  When I was a little bit older I wanted desperately to grow up and be an artist, but of course that idea was squashed flatter that a dollar bill because artist doesn't make money and thereby can't self support.  I was in 1st grade when that happened.
Did you happen to notice what that artwork on that door said? Take a Closer look right here.  Yep.  Guess I'm going to let that one be.

May 21, 2011

Patisserie; My Tennessee Waltz Finished!

Finished, Huzzah, Done.  Down your glasses and throw them into the fireplace, this quilt is done!  This twin sized quilt all started from that one pretty white print and everything followed from there.  This quilt is so bright I went with a light weight batting so that my daughter can have it on her bed whenever it pleases her.  Judging from the smile on her face, that took several pictures to capture, I think it will be seeing a lot of use.  It is a Twin long, in case she still loves in enough in her college days to take it with her.  But you don't get to see that picture because silly me deleted the pictures before checking to make certain they'd downloaded properly and all these were taken after she'd gone to bed.

My spouse made the templates for this fight star and I think I'd be happy to make it again.  Especially as my templates are acrylic, so I've put them away with my others if the mood ever strikes me.  As you can see this pairs amazingly well with the snowball blocks.

So what do you do when the threads are stuffed into the quilt and everything is done?  Well as this is that yuckie fusible batting I'll be washing it and then putting it on the bed of course.


While taking the retakes I kept hearing this noise on and on it went.  I was watching a male cardinal so I wondered if perhaps he was just telling me how his day was worse than me accidentally deleting a couple of pictures when all the sudden a blur of brown flew right at him.  Nothing like a little one to turn the moment around.  In a flash the baby flew to the nearby palm tree and DH snapped their picture.  What a cute family.
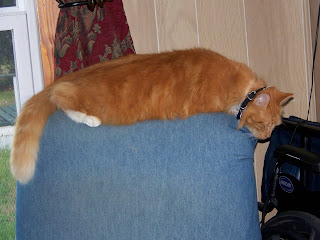
Sometimes when I post my completed quilts you ask me where is Tiny?  Well she's right here.  Even though she'd already been through this once about 45 minutes earlier she was more than willing to re-smell the same spot as before.  I thought it was funny because she looked at it like "Why does this smell like me?"  Maybe because you spent a month napping on it?  Now what would be a blog post with Tiny in it without at least saying something about Sunny.  Well earlier today he remembered that he likes to sleep on the back of my chair sometimes.  So he got up there looked around like "now what" as the chair was steadily rocking.  Sure looks like he figured it out.  Or perhaps since this is Sunny we're talking about, maybe he just got to tired to think about it anymore and sat down like Winnie the Pooh.

May 19, 2011

But it's a Cactus!

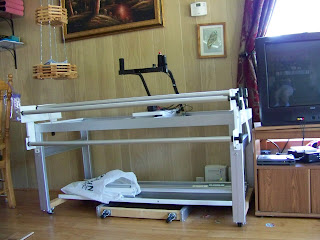
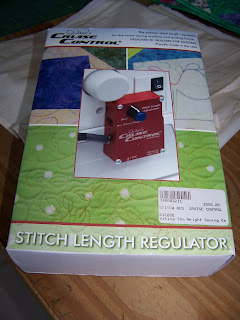
Yesterday afternoon the deal of a lifetime fell into our laps and we just couldn't pass it up.  A Inspira Home Quilting Frame, with a Stitch Length Regulator thrown in (yes you read that correctly).  My husband went, looked, and it and handed over the money.  When he arrived home I was stunned.

I've wanted a machine quilting frame for as long as I've known they existed.  But it was in this nebulous someday way.  As DH was bringing the parts into the living room, I was stunned beyond words.

I felt like the woman who really wants one of those smart yards.  They use very little water, they are great for the environment, they are easy to maintain, they win awards, the neighbors rave about them, and she really wanted one.  And then her husband starts ripping up the grass and everything starts sinking in as the plants start arriving.  "But they're cacti!" She protests.  Yep, it's a big giant cactus.

Let me tell you about the Inspira frame.  It's set up at 5' right now.  I never really thought about that in terms of three dimensional space.  But trust me that's big.  What about when I want it set up at 10'?  Then it will be even bigger.  It's made of aluminum.  That made me think of the old windows we took out last summer.    But that isn't right at all.  This frame makes the windows look like paper.  The aluminum is almost 1/4" thick in the tubes, and it's got some weight to it!  It's so heavy I went to help DH by attempting to bring in the shelving brackets - nope.  Maybe you're a Mighty Minnie Mouse, but I'm lucky I can pick up my 40 pound daughter when something happens to her.

So what does this mean?  I don't really know, you tell me!  LOL.  I sent off an email to the manufacturers of the stitch regulator, so we'll see what machines I can shop for.  Rumor has it there is an adapter that can be used, but I haven't discovered anything about that yet.

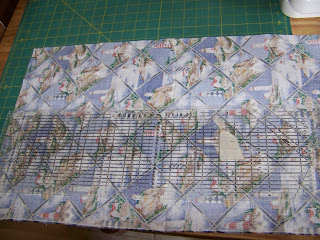
I'm thinking now would be the time to get one of those learn to quilt panels, Skill Builder Practice Panels - I think they're called.  You know I've ALWAYS wanted to make a whole cloth quilt...  Is that bad?  Should I not use those preprinted patterns?  And I know, something has to be done about the sewing machine first...

Anyone with any suggestions?  I'm all ears!  Oh yes and do you recall the open space in the living room and kitchen vacated when my sewing area moved to it's own room?  In a word "Gone!"

May 18, 2011

Worth Getting Steamed Over...

Thank you to everyone for your supportive comments concerning the shorts for Kailey.  You really are an inspiring bunch.  Thanks to my pal Vicki, I found two patterns to make today and one was even for pants.

Two pairs of pants and a dress joined my little quilted basket today.  The shorts I made second, and while I was thrilled to have a pattern to cut out, I was also really glad I've made pants a time or two before.  My "real people" patterns use the same method of stitching pants so that was  helpful.  If you'd like to make shorts for 18" dolls, such as American Girl Dolls, you can find the free pattern right here.

The dress is a free pattern from Liberty Jane and you can get the very clear directions here.  I guess I just think the one in their picture is prettier than the one I made.  Maybe it's just the fabric.  Remember those straps we made in the ice pack tutorial?  Well this requires you to make those, only they are barely over 1/4" wide when finished.  If I hadn't been already aware, I sure learned how hot the steam coming out of my iron is!

Now remember the pretty reversible sarong and matching top I made?  Well let's take a double take and peak at the new matching shorts I added.  Kailey's posed by the quilted tote I keep talking about because that's were I have all these pretties stashed.  Everything is layered in and ready to go for next month.

Two nights ago my DD was curled up with me and Kailey was sitting next to her, when all the sudden she grabbed the doll and said, "Oh no! You don't have a doll?!?  I will share Kailey with you.  Then she went on about how she would share Kailey with her entire family, including her dad.   Do you suspect she wonders about Kailey constantly turning up in the sewing room?

May 17, 2011

Kailey's PJ's

My daughter and I have matching nightshirts.  It was a case of having plenty of knit yardage.  When Kailey arrived for Easter I knew she'd need one too.  It was just a matter of having the doll in the sewing room, having the time and the inclination.

So what do you think of Kailey's latest garment?  This will go in the little quilted tote basket I made, along with a pair of sneakers, and the hawaiian sarong dress I made.  DD will receive those at the beginning of June.  DD seems to think Kailey should wear shorts under her dress for modesty like she herself does, so those are on my list too.  Can you tell how much I'm looking forward to making those?  How about not at all?

It's one thing to take clothes of any size that you already have and improvise a pattern on that, but to make shorts with nothing but a waist size to go on?  Only time will tell how I'll do.  Wish me luck.

May 16, 2011

Rice - Ice Bag

This is my free tutorial for making rice bags.  These bags can be used in place of gel packs, heating bags, etc.
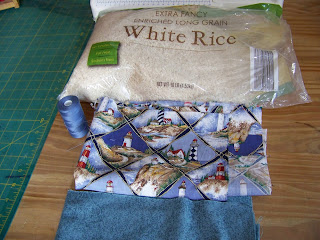
What you will need?
Rice (not this much) white or brown it doesn't matter
Thread
Fabric I recommend cotton, pick a fabric that makes you smile and feels nice under your finger tips
For one bag you will need a single piece of fabric roughly 18"x22"
Handles will be made from two pieces of fabric 3"x 12"

 How to make a Rice pack:

Firstly would you like coordinating handles or matching ones?  Now the easy way to make these handles require you cut them at 3" wide.  As for width use the largest hands in your house as a guide minimum width would be 12" and for max I'd say about 18"  Cut two of these.


Follow my steps for the handles in my collage as seen above.  Iron the fabric in half setting a hard crease.  Now open the fabric back up.  Fold the bottom half back and match it into that hard crease folding into the ugly side (if your fabric has one).  Iron and set that line.  Repeat for the top.  With both sides pressed inwards, refold on the hard crease and iron.  This will enclose your raw edges into the crease.

I like to stitch these little straps along the edge of both sides.  We are not quilting, we're sewing so put that 1/4" foot away.  This tutorial uses a standard sewing machine foot as we are striving for stress and pain relief!  Just line up the edge of the strap handle with the edge of the sewing machine foot and sew.  Flip it around and stitch the other side, not because you have to but because it makes the strap look nice.  Repeat for second strap.  Set them aside because would you believe they're done already?

Next take that 18"x22" piece of fabric, which is also known as a fat quarter and cut it in half down the length of the 22" so you have two pieces that are 9"x22".  One piece will be the lining and the other will be the exterior.  The lining can be any fabric you'd like, including something ugly you hate.  Just check that it doesn't show through.  I suggest using the same fabric for the lining as then there is no wrong way to worry about.

Place the wrong sides of the fabric together like a sandwich with mayo.  Pretty sides out.  See there on your left?  Now I like long rice bags so I can put them on my neck, wrap them around my foot, fold them in half and so on.  To get this; fold your layered fabrics together so it's still 22" long, but more like 4.5" wide.  Don't iron it or set a seam.

Now take your raw edges and sew down the entire length of the 22" creating a tube.  What width to sew it at?  Just line it up with your presser foot moving the needle all the way away from your raw edge.  I like to use a reinforced stitch, also sometimes called a stretch stitch.  It goes forward backward and forward again all in one straight line.  If yours doesn't do that you can just sew it twice along that same long line.  Note: I didn't have enough pretty nautical fabric so from here on you'll be seeing my lining fabric.


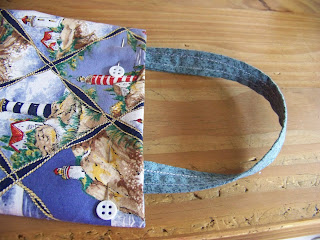
Above you can see my seam.  I've moved it to the middle of my tube.  I don't want it to wear and I like a nice smooth bag so by taking that seam from the edge and moving it to the middle you'll have a nice look and no rough edges.

Before we flip our bag we're going to sew our first side seam.  You wanted handles right?  This is the time to put them in.  If you don't care skip the step, but better to put them in now than to have to go back with your seam ripper.  See how my strap handle lays inside my tube?  You'll want yours to lay like that too, line up the ends of the strap with the edge of the tube, pin if desired. and stitch another nice wide seam.  What about that first raw seam down the length?  It's fine don't worry about it, just stitch it down as you sew.

You put the handle in and now you're going to be so glad.  Reach into your tube with your fingers and grasp the handle.  Pull and voila, turn it right side out, as I have photographed below.  Smooth the tube with your hands and roll that short seem up by the handle in between your fingers.  This will pop them out nice and pretty.


Take an extra minute now, I know you can hardly believe you're almost done, but this step is worth it I promise.  Take that iron we all love to hate and make sure your long seam is laying all to the same side.  Gently iron it down, but be careful not to crease the edges of your bag, after all we're not making pants.


Looks great!  It's time to add the rice.  Don't get ahead of yourself though.  Only fill it half full.  Then move the rice around and make it lay flat, note it should be nice and flat not big and round.  I like to grab my open end and hold it closed, use the entire width of your hand to hold it closed if you check it this way to ensure you have enough space to stitch it closed later.  Then I can put the tube behind my neck.  To much?  Take some out, to little add more.  See how I have extra fabric when I pull up on the tube in the middle?  This is important and will add to your future comfort.

Rice all settled?  Tip the bag up so all the rice runs to your finished end.  Now just fold the end on itself by about an 1", press it with your iron to ensure an easy line to sew.  Wait!  Don't forget time to tuck in your second handle strap.  Instead of having the strap inside the tube, the second strap stays to the outside with the raw ends going in.  Line it up and pin.  Just watch out for those pins.


Sew that last line, line up with the presser foot.  I like my seam to be a little closer to the end than it was earlier to ensure I catch those ends I tucked in, so move the needle to the middle of the presser foot.  I like to sew this line twice so run over it once and then again.  Concerned your ends don't look the same?  Well then tip all the rice to the end you just finished and stitch that end over again same as before.  I only bothered with that extra effort on one of my rice bags.
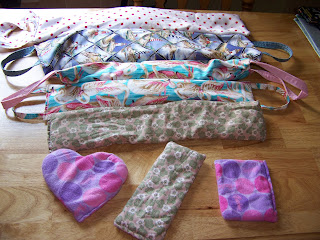
Are you locked into this size?  No, of course not.  It works out nicely because half a yard makes two.  But you can make it whatever size you'd like.  This is our collection.  I am certain we have another pink and purple heart, so it must be in DD's bed.  The nautical bag you see me making in this was a bit bigger I used two pieces approximately 16"x26".  So gauge it up or down depending on your need.  As often as not my daughter will reach for the polka dotted one (same size as the nautical one) but it was comical to see her with it when she was smaller.

So why put the handles in?  Put that pack you just made behind your neck and give it a little tug on the handle.  This will allow you to adjust the bag and the ice within using very little movement on your part.

I use two layers because I used to make rice socks and I found the more I used the ice sock the more little bits the rice had and it would migrate out of the sock and onto my skin.  This was very uncomfortable.  Two layers of fabric will prevent this migration.

Directions for use:

Store in the freezer for all aches and pains.  If the pain isn't relieved when the cold dissipates from the rice, place the pack into the microwave.  1-2 minutes for this size.  Be careful it will be hot and may require a towel between you at it at it's hottest point.  This provides a moist heat that you may find more relieving than a traditional heating pad.  Please rice ice only for children (no heat) and for all pain both short and long term consult a doctor.  Some people will wash and dry these in the washing machine and then in the dryer.  My only experience cleaning them is to spot treat them as needed and allow the bag to hang to dry.  I fuss with the rice within the bag to ensure it is fully dry before returning it to the freezer.  Alternatives to rice include craft beads, which I have seen at that big chain store we all hate.  I do not know how well they hold the cold, and I am certain at least some of them say not to be used with heat.  Most likely because they are plastic.


I wish you relief from whatever ails you.

May 14, 2011

Christmas Quilt-a-long 2011 May Wrap Up

Last post of the night for me.  Dinner has been served, the kitchen is clean, and I finished up my May BOM's!  That has been quite the challenge for me in the past so here are the photographs.   I have to say I really liked these little nine patch variation blocks, they seemed to go much more quickly than the others.  I wonder how many more little cheaters like this that we will have?

In case you missed my catch up post below I have photographed all of my blocks to date for our Scatty Christmas Stars Quilt together for reference.   
Hopefully everyone is happy with this month's progress, I know I am. 

Christmas Quilt-A-Long Year 2 May: Art for Your Bed

I was really torn between the Quilt Festival, Blog hop more or Quilt?  Sheesh, what a pair to be torn between.  I did get back to my little project for the day though.

This is the reverse applique turtle quilt I've been talking so much about.  It's planned to be a twin size, but it might have it's own designs on me, we'll just have to wait and see.  Already this block walked all over me.  Look at the way it pops and crinkles!  Not my normal method at all, but I just love how organic it is.  What do you think?

I've always known this quilt to be the contrast of my Hawaiian Ocean Applique Quilt, born of one, but forever another.  I'll square it back to the green and we'll see how the other blocks go before really settling on a layout.

No worries, I am still working on the Hawaiian Ocean, I prepped another 3 blocks for DH to cut for me, and I'm sure there is an end in sight there somewhere.

How have you been getting along this find Quilt-a-long day?  It was beautiful and hot here earlier, but then the sky opened up and dumped rain all over us.  The sun is still hiding behind the clouds so I think I might just plan my colors and maybe cut the fabric for my Christmas Scatty Stars BOM, as the light just isn't good enough to keep working on these turtles.

Christmas Quilt-A-Long Year 2 May Lunch time

Today is this Month's Quilt-a-Long Day.  DD beat me to the computer so I have to admit I've gotten started without telling you.  This morning already I have made two rice bags.  These are seriously good for what ails you.  I keep mine in the freezer for aches, pains, bumps, bruises, and generally whiney children.  Then in my case if the pain prevails past when the cold has slipped away I stick it in the microwave for about 2 minutes, and go with the heat.  Still having a little trouble; go to the second rice pack that's in the freezer waiting and start over.  The treatment of cold to hot and back confuses the nerves and they stop complaining.  Note: I don't use the heat packs on the whiney children.

Tropical Rice Ice Packs
I have noticed though that DD likes to make off with them.  Taking them to bed with her, leaving them around the house and so forth.  Her favorites are the ones sized like I prefer even though she has small heart shaped ones, in pink and purple with the infamous Barbie logo on them.  I'm so tired of going to the freezer only to find I forgotten to put the one I'd been using the night before in the freezer, and DD did the same with the one she was using, so I went ahead and made two more.  This fabric is so nice and tropical I think you can't look at it without feeling some of that tension slip away.

The handles are added for added comfort, and I've found if I use two layers of fabric it is more gentle on my skin.  I add rice until they are half to 3/4ths full, you'll know if they don't have enough or if they have to much because the rice can't move around within the bag and soothe the affected area.  I somehow am nearly out of rice so when I buy some I'll be stitching up these two and adding them to my collection.

3 1/2 yards batik
It's nearly lunch but I wanted to take a moment to also share my afternoon project with you.  See this beautiful batik?  I'll be using this on some reverse applique turtles I plan to work on.  I've already ironed the fabric - since taking the picture - so I'm good to start cutting my 21" blocks.  Anyone have a good way of cutting large blocks like this?  I once saw a 24" square up ruler online but the place doesn't carry them anymore and I haven't had any luck finding another.  Currently my largest square up ruler is 16.5" and trust me I'd love a couple more inches.


Hopefully everyone has been happily stitching today and no one is feeling under the weather.  How about your sewing machines?  Stitching away perfectly I hope!

May 13, 2011

Spring Quilt Festival 2011

Lollipop Baby Quilt
Welcome fellow bloggers!  I love doing Amy's Quilt Festivals and this time is no exception.  Normally I show off a large quilt but this time I'm going to show something a bit smaller.  This is my modifications to Moda's Lollipop Quilt.
This quilt was a challenge, because while I wanted to keep the concept of the original design, I wanted to make it into a baby quilt instead of a wall hanging. This kit was plenty generous with fabric so I only needed to add a new backing fabric.  The next challenge was the colors.  I don't usually work with fabrics like these, I'm more of a bi-color quilt girl, or even a single color, I like order to my quilts and I tend actually have to work harder to force a scrappy look, vs. if I had just gone with the yardage my fingers couldn't resist.
This quilt was one I made while working on the Freemotion Quilt-a-long, so I had both that quilt and this one going at the same time.  What a rush having my sewing machine tuned just right!  When I feel the fear of how in the world will I quilt this coming on I can just look at my quilting and say, hey there's an option here somewhere.  Do you have an inspiring quilt like that?  Well I'd love to hear about it, so drop me a comment.  I know you're busy hopping the Festival so I'll let you get back to it.  

I love when the binding gives just the right touch!
As always happy Quilting! 


May 10, 2011

Tropical Waves Top Complete

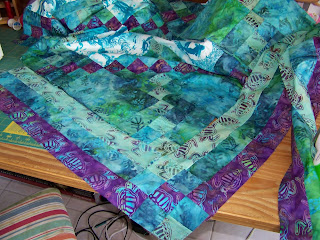
Last night after DD was in bed, my husband went off to the sewing room to detox.  LOL, now what was he doing in there?  Playing computer games, but this way was more fun to say.  So while he did a bit of that (I got him hooked on the game, so no love loss there) I decided to add the borders to Tropical Waves.  The top is all done and the final size on the top is around 54"x94" so that's a pretty decent twin size.

What do you think? I took the pictures for you first thing this morning.  Tiny looks really settled, but in truth I only spread the top out long enough to take the picture, so she only just got up there.  I think I'm leaning towards a single piece of fabric for the back.  Perhaps a batik with purple and teal, perhaps something simple, none to fussy.

I once found the perfect water fabric, Atlantis by Sentimental Studios for Moda in blue.  I bought seven yards when I found it to use for my Hawaiian Ocean Applique Quilt, and I wish I'd bought every last piece they had.  I'm always thinking of quilts that could use such a pretty fabric for the back.  Oh well I'm certain the right fabric for this one is out there too, the joy of course comes in finding it.

I ordered the FQ I needed for the binding for Patisserie, would you believe they told me 4-14 days?  That seems a bit wide open.  No matter I have plenty to do in the sewing room until my package arrives.  What are you working on right now?  I was shocked yesterday when I visited fellow blogger Penny's Blog, and discovered the Quilt Festival is next week.  Wow that was quick.  Last year I really really wanted to make it through the entire list, but I didn't, some people may have and all the more applause to them.  We'll see what this new festival yields, some pretty quilts at the very least of that I'm certain.

May 09, 2011

Tropical Waves Plans Itself

I came up with a border for Tropical Waves, and when I did I thought, hey it can go on two different ways, how about I get the border sewn together without sewing it on and hold a vote right here and see who likes which way better. Great idea right?  Well the trouble with the border I picked - once I laid it out I could see there was very much a right way and a wrong way for the quilt.  So guess what?  I decided the quilt decides this time.
See to the left how the crossing line of teal moves through the border's corner block, while continuing on the same line?

Now in the second picture look past the tip of the quilt back towards the crosses, see now how the purple diagonal is completely parallel to the purple in the corner block of the border?  I think this way will frame the quilt nicely.

My new iron arrived this morning, first thing, I was rather surprised as we're normally on the "oh I forgot" evening pass.  After much research I elected to buy the exact model my neighbor loaned me?  Why?  Oh well let's see, it never peed on me the way the old one did, it has a bigger sole plate so ironing goes more quickly - but weighs the same as my old one.  It also has more steam settings than I would have dreamed possible.  Do you know what I say to those set it wrinkles now?  Shot of stem!  Hiss - Gone and that's nice.

So after I was done with the border of Tropical Waves, instead of sewing it on I started pressing the folded border for the Dresden Plate Quilt, and that went fine as well.  Not sure how long I'll keep the box, I like to always have my iron at my fingertips, whereas having the box implies I will put it away at some point.

May 07, 2011

A little bit of Knit

Knit Dishcloths
I started these yesterday afternoon while I waited for DD's bus.  I'm surprised I've gotten the first one done already.  Seems practice does add to your speed.  These are dishcloths.  I've always had this on going problem of the towel sliding into the sink or worse onto the floor as it dries, so as the slightly long and skinny dishcloths, I made for DH for Christmas, seem  to slip less, I went the extra step and knit pearl stitches into the center stripe.  I'm hoping they will provide a bit more resistance against slipping.

I took the picture with the little pearls down as they don't show as well as the knit side.  What do you think of my little loops at the end?  I've been putting those in at the end of my dishcloths lately, it doesn't take any extra work and I feel it makes them a bit more versatile.  Not to mention now they can hang from the loops to dry!  LOL.

This yarn is another cotton ball because the cotton is so nice to work with and provides a nice texture when knit.  This little pair will be off to my neighbor's as a just because gift and of course because she lent me the use of her iron for me to alleviate my quilting itch, shh don't tell.  I bought the yarn when we were out shopping together the other day she liked the green and I thought the blue made such a fresh blend I couldn't resist buying it.

In case you're wondering I have cut the strips for the triple border of my Tropical Waves Quilt, but I am waiting on my new iron - due from Amazon on Monday!!!  - before I proceed further.  I will be so glad to have an iron in the house again and that's from a person who hates to iron.  How did I get here?  I actually liked my neighbor's iron so much that I bought the exact model she lent me.  I'll tell you all about it after it arrives.