
 What you will need?
Rice (not this much) white or brown it doesn't matter
Thread
Fabric I recommend cotton, pick a fabric that makes you smile and feels nice under your finger tips
For one bag you will need a single piece of fabric roughly 18"x22"
Handles will be made from two pieces of fabric 3"x 12"
How to make a Rice pack:
Firstly would you like coordinating handles or matching ones? Now the easy way to make these handles require you cut them at 3" wide. As for width use the largest hands in your house as a guide minimum width would be 12" and for max I'd say about 18" Cut two of these.

Follow my steps for the handles in my collage as seen above. Iron the fabric in half setting a hard crease. Now open the fabric back up. Fold the bottom half back and match it into that hard crease folding into the ugly side (if your fabric has one). Iron and set that line. Repeat for the top. With both sides pressed inwards, refold on the hard crease and iron. This will enclose your raw edges into the crease.
 I like to stitch these little straps along the edge of both sides. We are not quilting, we're sewing so put that 1/4" foot away. This tutorial uses a standard sewing machine foot as we are striving for stress and pain relief! Just line up the edge of the strap handle with the edge of the sewing machine foot and sew. Flip it around and stitch the other side, not because you have to but because it makes the strap look nice. Repeat for second strap. Set them aside because would you believe they're done already?
 Place the wrong sides of the fabric together like a sandwich with mayo. Pretty sides out. See there on your left? Now I like long rice bags so I can put them on my neck, wrap them around my foot, fold them in half and so on. To get this; fold your layered fabrics together so it's still 22" long, but more like 4.5" wide. Don't iron it or set a seam.
 Now take your raw edges and sew down the entire length of the 22" creating a tube. What width to sew it at? Just line it up with your presser foot moving the needle all the way away from your raw edge. I like to use a reinforced stitch, also sometimes called a stretch stitch. It goes forward backward and forward again all in one straight line. If yours doesn't do that you can just sew it twice along that same long line. Note: I didn't have enough pretty nautical fabric so from here on you'll be seeing my lining fabric.

Above you can see my seam. I've moved it to the middle of my tube. I don't want it to wear and I like a nice smooth bag so by taking that seam from the edge and moving it to the middle you'll have a nice look and no rough edges.

You put the handle in and now you're going to be so glad. Reach into your tube with your fingers and grasp the handle. Pull and voila, turn it right side out, as I have photographed below. Smooth the tube with your hands and roll that short seem up by the handle in between your fingers. This will pop them out nice and pretty.

Take an extra minute now, I know you can hardly believe you're almost done, but this step is worth it I promise. Take that iron we all love to hate and make sure your long seam is laying all to the same side. Gently iron it down, but be careful not to crease the edges of your bag, after all we're not making pants.

 Looks great! It's time to add the rice. Don't get ahead of yourself though. Only fill it half full. Then move the rice around and make it lay flat, note it should be nice and flat not big and round. I like to grab my open end and hold it closed, use the entire width of your hand to hold it closed if you check it this way to ensure you have enough space to stitch it closed later. Then I can put the tube behind my neck. To much? Take some out, to little add more. See how I have extra fabric when I pull up on the tube in the middle? This is important and will add to your future comfort.
 Rice all settled? Tip the bag up so all the rice runs to your finished end. Now just fold the end on itself by about an 1", press it with your iron to ensure an easy line to sew. Wait! Don't forget time to tuck in your second handle strap. Instead of having the strap inside the tube, the second strap stays to the outside with the raw ends going in. Line it up and pin. Just watch out for those pins.
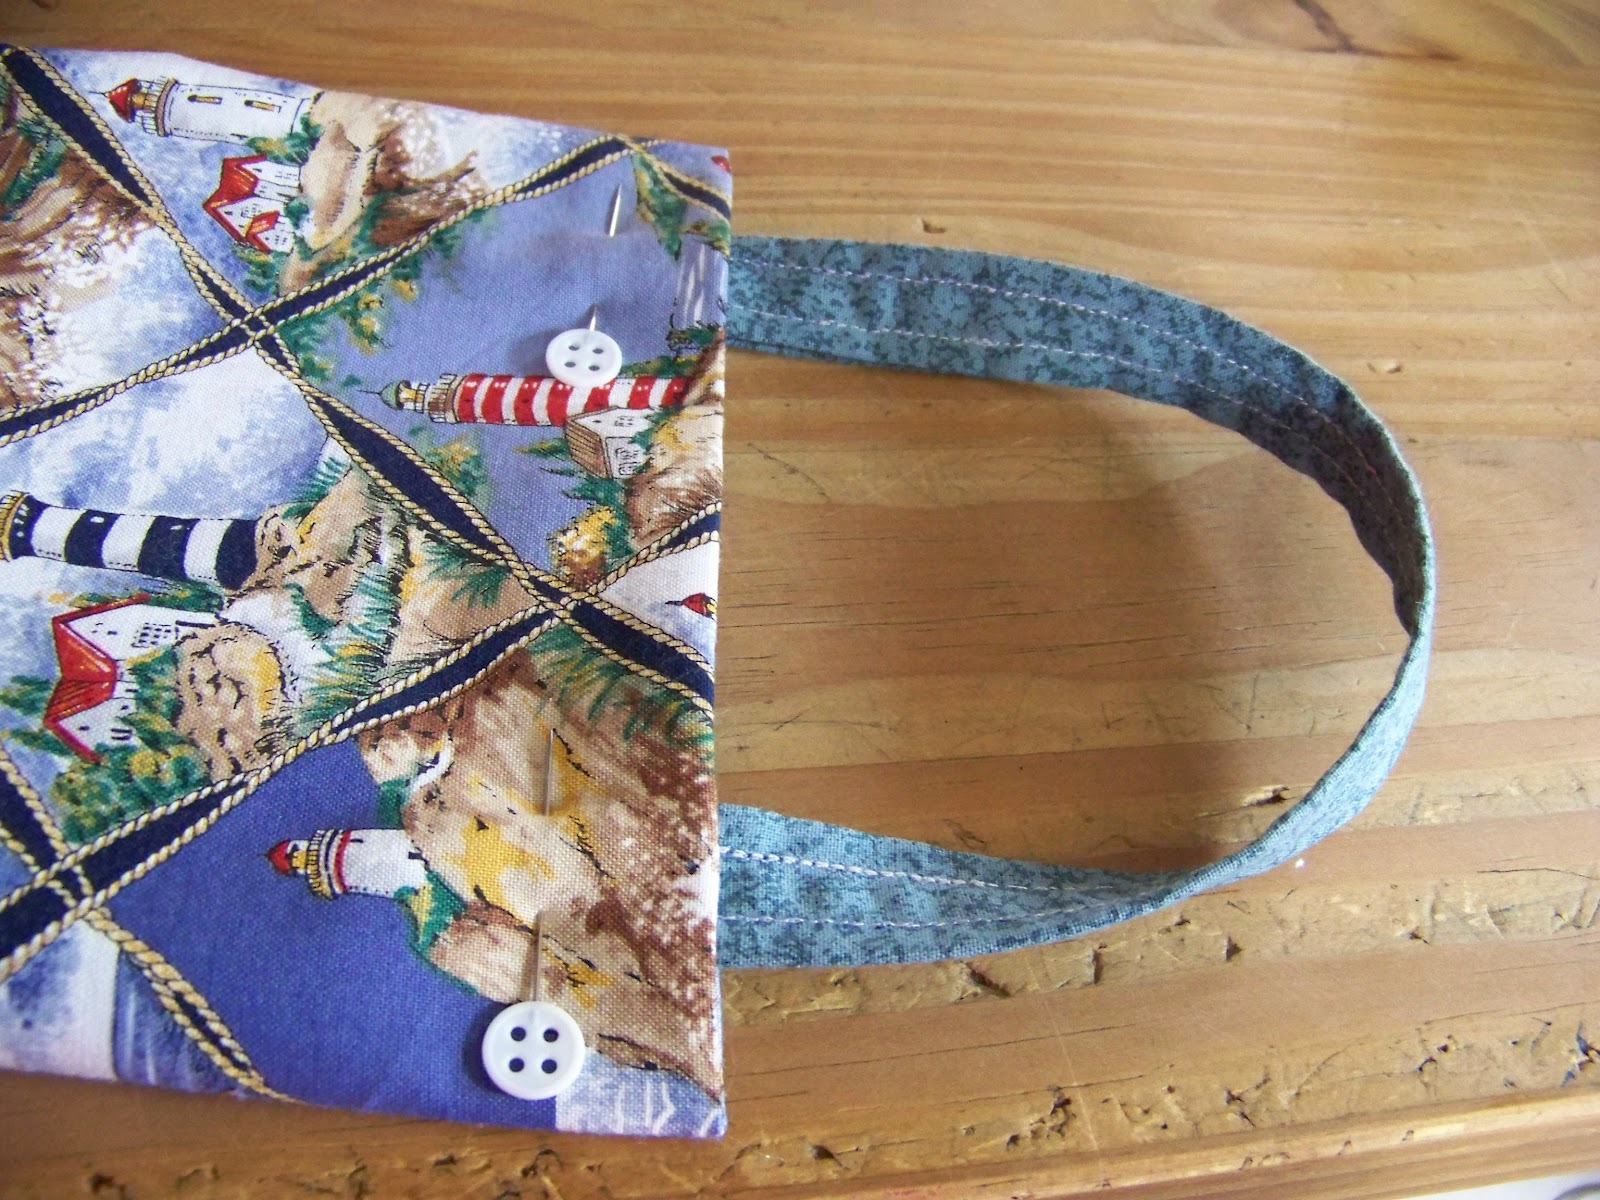
 Sew that last line, line up with the presser foot. I like my seam to be a little closer to the end than it was earlier to ensure I catch those ends I tucked in, so move the needle to the middle of the presser foot. I like to sew this line twice so run over it once and then again. Concerned your ends don't look the same? Well then tip all the rice to the end you just finished and stitch that end over again same as before. I only bothered with that extra effort on one of my rice bags.
 Are you locked into this size? No, of course not. It works out nicely because half a yard makes two. But you can make it whatever size you'd like. This is our collection. I am certain we have another pink and purple heart, so it must be in DD's bed. The nautical bag you see me making in this was a bit bigger I used two pieces approximately 16"x26". So gauge it up or down depending on your need. As often as not my daughter will reach for the polka dotted one (same size as the nautical one) but it was comical to see her with it when she was smaller.
So why put the handles in? Put that pack you just made behind your neck and give it a little tug on the handle. This will allow you to adjust the bag and the ice within using very little movement on your part.
I use two layers because I used to make rice socks and I found the more I used the ice sock the more little bits the rice had and it would migrate out of the sock and onto my skin. This was very uncomfortable. Two layers of fabric will prevent this migration.
Directions for use:
Store in the freezer for all aches and pains. If the pain isn't relieved when the cold dissipates from the rice, place the pack into the microwave. 1-2 minutes for this size. Be careful it will be hot and may require a towel between you at it at it's hottest point. This provides a moist heat that you may find more relieving than a traditional heating pad. Please rice ice only for children (no heat) and for all pain both short and long term consult a doctor. Some people will wash and dry these in the washing machine and then in the dryer. My only experience cleaning them is to spot treat them as needed and allow the bag to hang to dry. I fuss with the rice within the bag to ensure it is fully dry before returning it to the freezer. Alternatives to rice include craft beads, which I have seen at that big chain store we all hate. I do not know how well they hold the cold, and I am certain at least some of them say not to be used with heat. Most likely because they are plastic.

I wish you relief from whatever ails you.
2 comments:
Thanks for the tutorial, much appreciated.
That's brilliant, Elizabeth - really clear - thank you very much!
Post a Comment